

Dynamics NAV provides a very time efficient tool to generate financial reports on the fly. The functionality is called: “Account Schedules”. A very NAV specific term (so I understand if you don’t know what it is).
I can tell you this, it takes about 30 seconds to generate a P&L and a Balance Sheet via Account Schedules and maybe a few more minutes if you want to format the columns to make it look nicer.
You might wonder why would there be a need to create P&L and Balance Sheet reports, as the system should generate them automatically.
This is where one of the flexibilities of NAV becomes apparent. The chart of accounts within NAV is an internal company-specific structure. It doesn’t need to follow compliance reporting. When an account schedule is used to generate a report, additional functionality becomes available such as:
- The lines on the account schedules can have their own descriptions
- Accounts can be combined or separated based on criteria
This means that you can generate reports that meet all the compliance guidelines and still have a chart of accounts structure that serves your business independent of these requirements.
A tip: NAV does create the Income Statement and Balance Sheet automatically but for the purpose of this blog, we will create one from scratch.
Step 1: Create an Account Schedule Name and add lines
On the Account Schedules screen, click on New and enter a Code and a description for the report
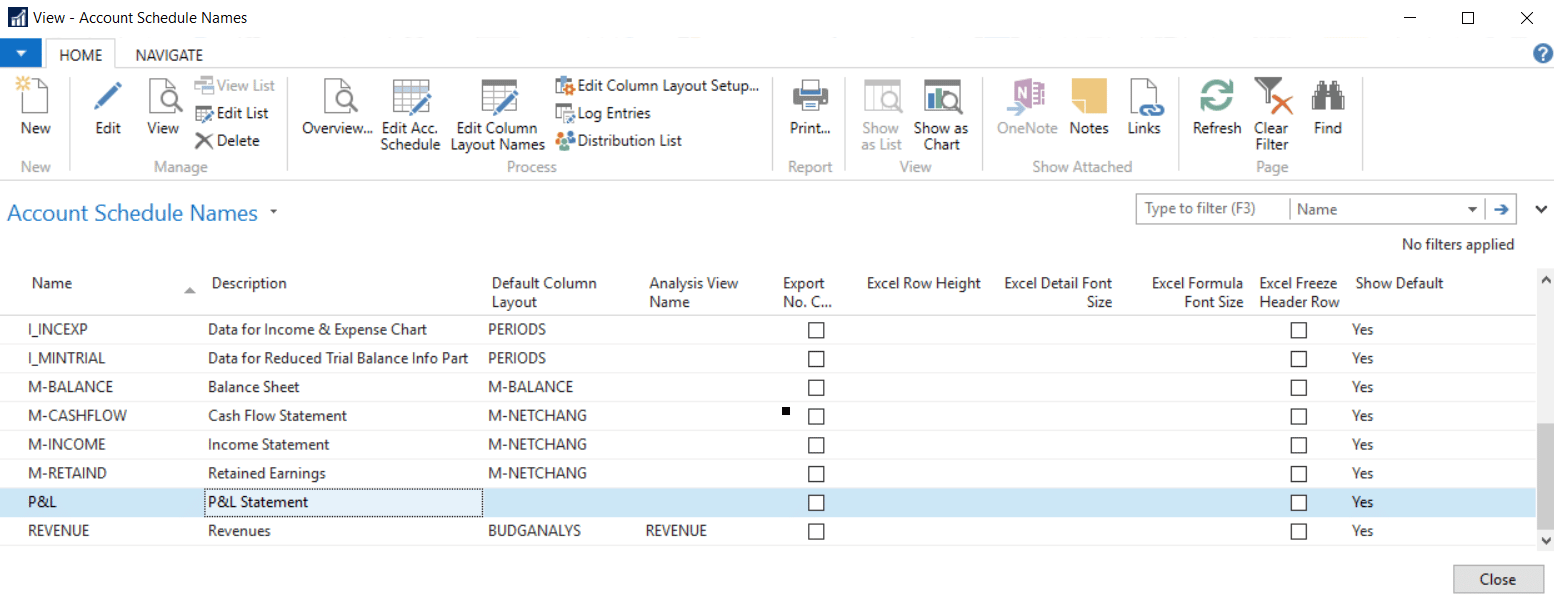
Click on “Edit Acc. Schedule” then “Insert G/L Accounts” action to add lines

Once you have added lines, you can change descriptions, combine accounts or separate them (with dimension filters) if needed.
Step 2: Generate a Column Layout
On the Account Schedules page:
- Click on “Edit Column Layout Names”
- Create a new column layout. Let’s call it “BLOG”
- Click on “Edit Column layout setup”
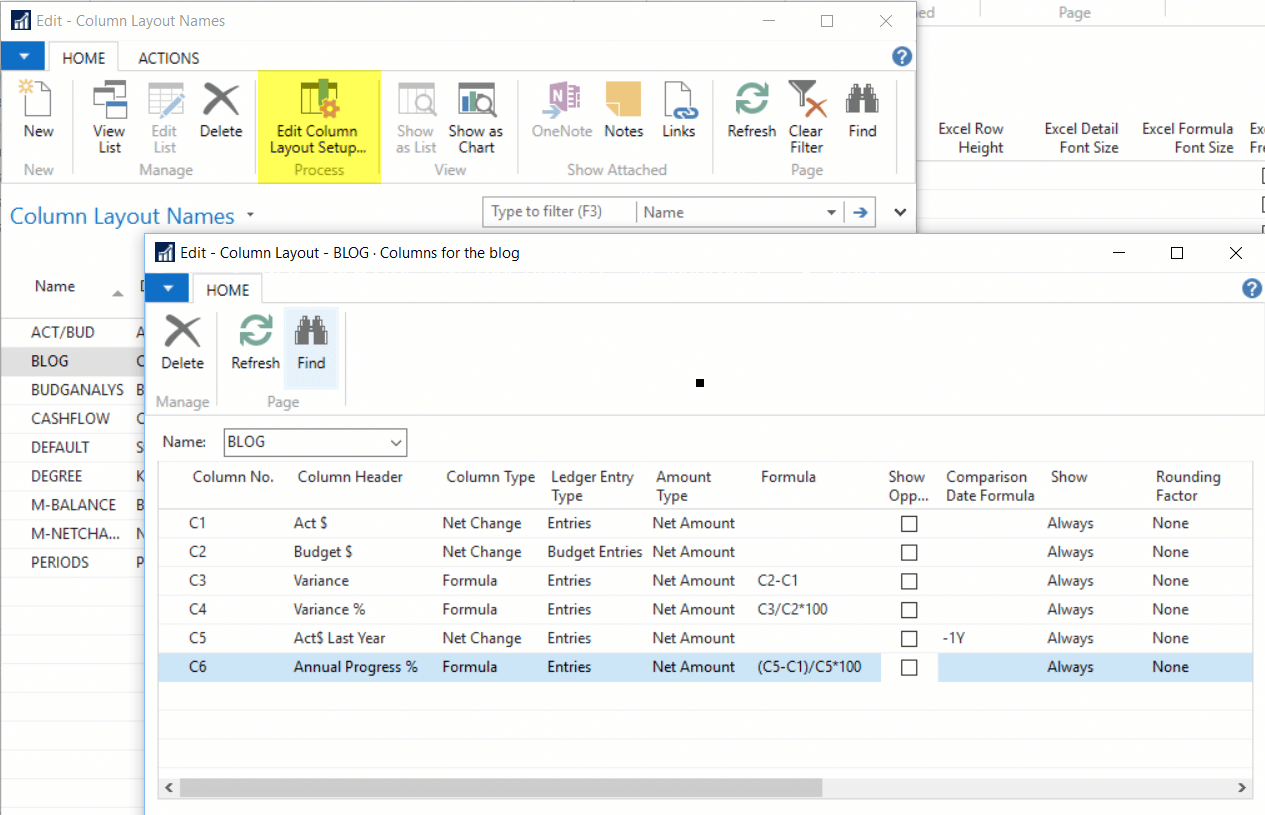
There are many column types and you can ask the system to give you amounts based on actuals, budget, and last year comparisons, as well as various formulas.
When you create a new line, the system assigns many default values and you only have to change these if you require a different result.
This is how to set up the columns that are shown in the screenshot above:
Actuals: This is the easiest one. Set Column No. as C1 and enter a description – that’s all
Budget: Same as above, just change the Ledger Entry Type to “Budget Entries”
Variance: Setup Column Type as Formula and enter the formula
Last Year Actuals: Same as Actuals, just add “-1Y” to the Comparison Date formula
Step 3: Attaching a Column Layout to the Account Schedule Report
On the account schedules page, simply assign the column layout to the report. If you create the column layout first, you can always create a new report and assign the column in the same step.
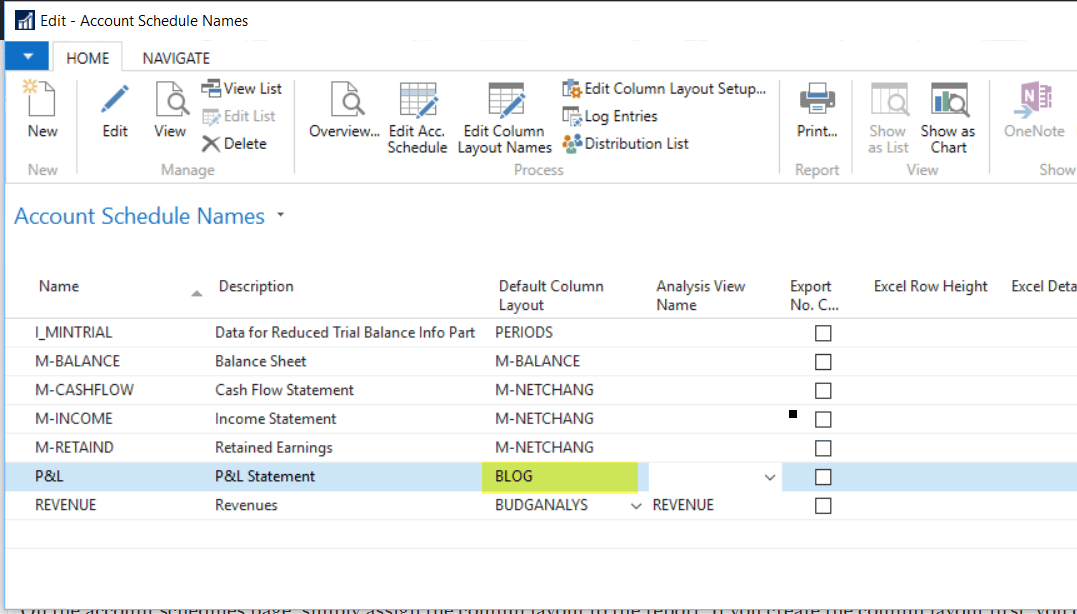
Congratulations. Your report is completed.
Step 4: Running the Account Schedule (On screen, output to pdf, output to Excel)
Click on “Overview” to run the report.
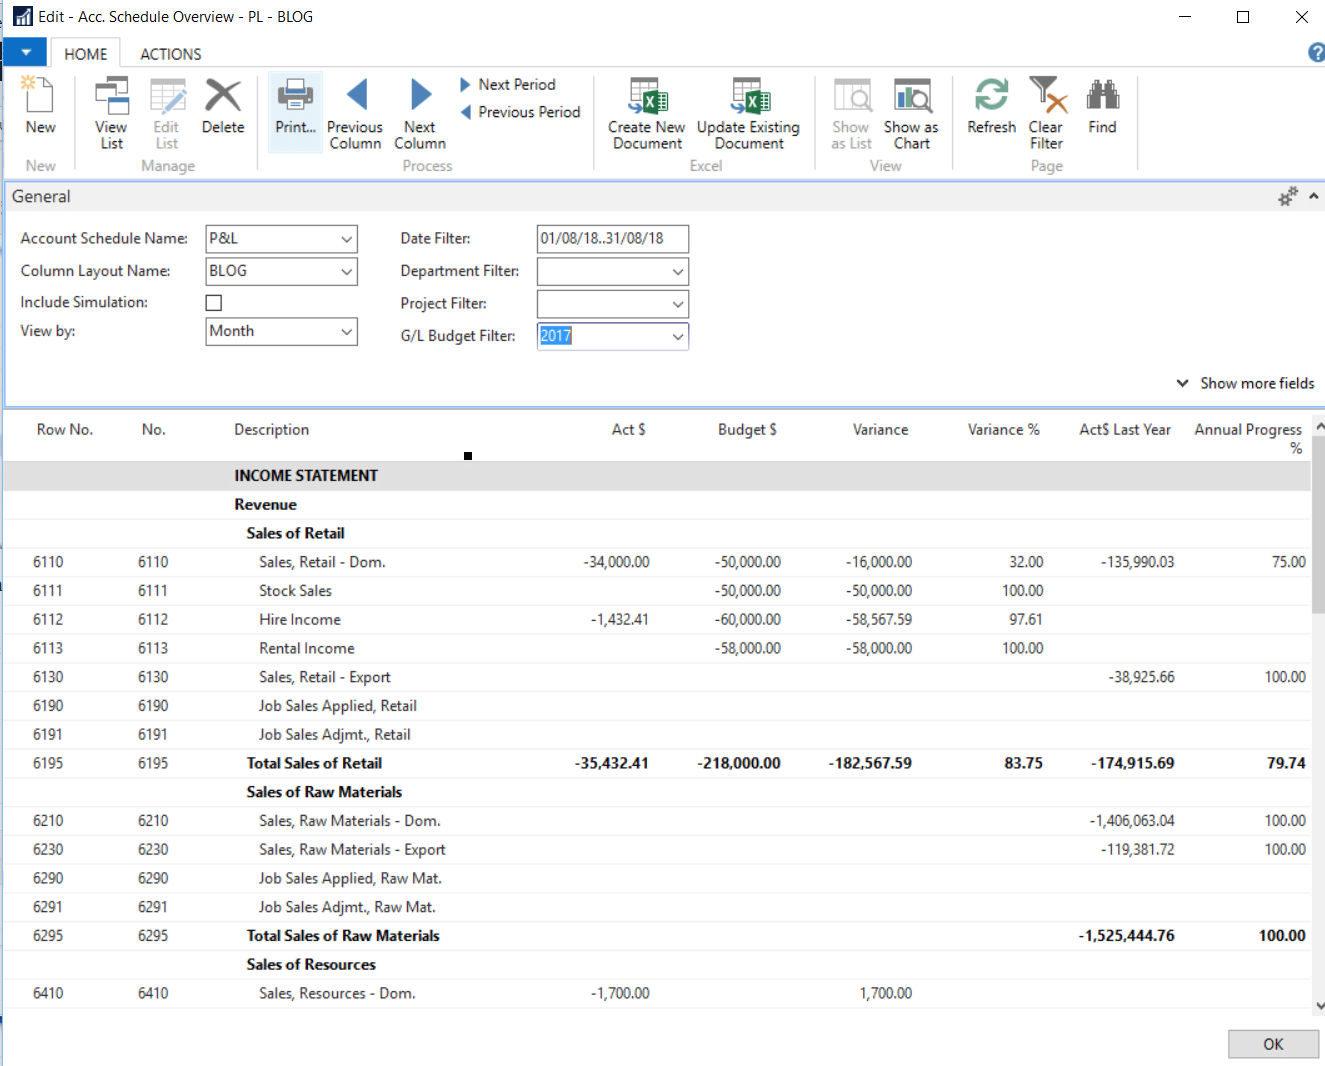
That took only about 2 minutes (the rest of the times was spent writing the blog and taking the screenshots)
As you can see, Account Schedules are a quick and efficient way to generate your financial reports on the fly. Give them a try.